 En
En
 English
  Français
  русский
  中文简体
中文简体  عربى
عربى  Español

A bucket elevator belt replacement is a planned shutdown job, not an emergency repair, and it runs fastest when the crew treats it as four separate tasks: isolate the machine, remove the old belt, position and splice the new one, then tension and track it under load. On a belt-type elevator handling granular fertilizer, cement or mineral powder, a three-person crew typically completes the change in 8 to 16 hours, provided the replacement belt is already on site, the splice method was decided in advance, and the buckets and bolts are inspected while the belt is off the machine.
What This Procedure Covers, and Which Elevators It Fits
The sequence below is written for belt-type bucket elevators, where a continuous fabric or steel-cord belt carries the buckets between a head pulley and a boot pulley. Chain and plate-chain machines use a rigid tension member, so the running gear cannot be cut and re-joined in the same way and they follow a different maintenance method.
 TD Bucket Elevator in Elevating Equipment Product RangeListed under Elevating Equipment, this TD Bucket Elevator page appears before belt replacement guidance for belt-type bucket elevators and scheduled shutdown maintenance.View Product →
Planned wear-out
The belt has reached the end of its service life and is changed during a scheduled shutdown. This is the lowest-risk version of the job.
Localized damage
A tear, gouge or edge fray is confined to one section. Cutting out the damaged length and re-splicing is usually faster and cheaper than a full change.
Emergency failure
The belt has snapped or de-tracked. The steps are similar, but buckets, casing and pulleys may already be damaged, so the job becomes a repair as well as a replacement.
Before ordering a new belt, confirm the problem is not simply a tensioning issue. Full replacement is normally justified when a belt already carries several repairs, when the carcass is exposed over a long length, when elongation can no longer be taken up by the remaining tensioning stroke, or when the same edge keeps rubbing a pulley after repeated alignment attempts.
 NE Plate Chain Bucket Elevator for Vertical Bulk HandlingPositioned between belt replacement guidance and downtime planning, this NE plate-chain bucket elevator handles powders, granules and abrasive bulk materials.View Product →
How Long the Change Really Takes
Downtime is set by five variables, and only one of them is the belt itself. Height, access and belt stiffness normally dominate the schedule, so a job planned around the belt alone will usually overrun.
| Variable | Effect on downtime | What shortens it |
|---|---|---|
| Centre distance and lift height | Every extra metre of belt has to be pulled through the casing | Pre-rigged guide ropes and a powered winch at the head |
| Belt weight and stiffness | Heavy steel-cord belts resist bending around the boot pulley | Feeding from the boot upward instead of pulling from the head |
| Splice method | Mechanical splices take 1 to 2 hours; vulcanized splices add cure or cooling time | Deciding the splice type before the belt is ordered |
| Access and lifting equipment | Poor access can double the handling time on its own | Opening the head and boot covers and staging tools the day before |
| Crew size and experience | A first-time crew works slower and makes more alignment errors | Three to four people, with one person dedicated to tracking the belt path |
Isolation, Lockout and Staging
Every hour saved later comes from work completed before the belt moves. Isolation is not a formality: a loaded elevator holds enough stored energy to turn the head pulley the moment tension is released.
- Shut down the elevator and every upstream unit that feeds it, then let the belt come to a complete stop.
- Apply lockout and tagout at the motor starter, not only at the local control panel.
- Empty the legs and boot of standing material; a half-full boot will bury the new belt during the first run.
- Open the inspection doors at the head, the boot and at least one intermediate section so the belt can be guided.
- Rig the lifting points and position the winch before anything is cut.
Stage these tools and consumables beside the machine before the shift starts, so nobody has to leave the platform mid-job:
- Replacement belt, pre-cut to length with both splice ends squared and marked
- Splice hardware, or vulcanizing equipment with a power supply
- Come-alongs, slings, guide ropes and a winch rated for the belt weight
- Torque wrench, socket set and a full set of spare bucket bolts
- Pry bars, belt clamps, a sharp knife and a marking pen
The Replacement Sequence, Step by Step
Step 1: Release the tension and lock the take-up
Back the take-up off completely before the belt is cut, then lock it so it cannot creep back under its own weight. Note the position of the take-up frame, because the new belt will normally start from a similar setting.
Step 2: Cut the belt and control both ends
Cut at a point that is easy to reach and clear of a bucket. Clamp both cut ends to the casing or to a sling before the final few millimetres are cut, because an unrestrained belt can drop through the boot and whip back up the leg.
Step 3: Pull the old belt out and feed the new one through
Remove the old belt from the head end, then join the new belt to the tail of the old one with a pulling plate or a temporary lap splice and feed it through the same path. Feed from the boot upward, keep guide ropes on both edges, and stop every few metres to confirm the belt is not twisting behind the buckets.
Step 4: Make the splice
Bring the two ends together with the correct overlap, square them, and complete the splice to the specified pattern. Check the direction before closing the joint: on a mechanical splice the leading edge should trail so the fasteners do not catch on the pulleys.
Step 5: Reset tension and check running clearance
Take up tension until the belt sits firmly on the boot pulley without slipping, then turn the machine by hand through two complete revolutions and watch the bucket-to-casing clearance at the tightest point. Correct any contact before the motor is re-energized.
Mechanical Splice or Vulcanized Splice
The splice is the weakest point of any elevator belt, so the choice should be made on centre distance, drive tension and the shutdown window you actually have, not on habit.
| Aspect | Mechanical splice | Vulcanized splice |
|---|---|---|
| Time to complete | Roughly 1 to 2 hours | 4 to 8 hours, including heating or curing |
| Joint efficiency | Commonly 50 to 75 percent of belt strength | Commonly 80 to 100 percent of belt strength |
| Tools and skills required | Hand tools and basic training | Press or bonding equipment and trained personnel |
| Best suited to | Short lifts, tight shutdown windows, temporary repairs | Tall elevators, high-tension drives, long service life |
| Re-splicing on site | Straightforward | Difficult without a workshop |
What to Inspect While the Belt Is Off
The belt change is the only time most of the elevator's internal hardware is visible, so use the window. A defect found now costs minutes to fix; found later, it costs another full shutdown.
- Bucket lips and backs for wear-through, cracking or distortion
- Bucket bolts, replacing any with a worn head or flattened thread
- Head and boot pulley lagging for glazing, grooving or missing sections
- Boot pulley bearings and seals for play, noise or grease loss
- Casing liners and the discharge throat for holes that let material fall back into the boot
- The take-up frame and its guide rails for corrosion or binding
Elevators of this type sit at several points along a compound fertilizer production line, where a single belt may carry abrasive, slightly damp granular product between the dryer, cooler and screening stages. That duty punishes both the belt and the bucket fixings, which is why bolt checks during a belt change are worth the extra half hour.
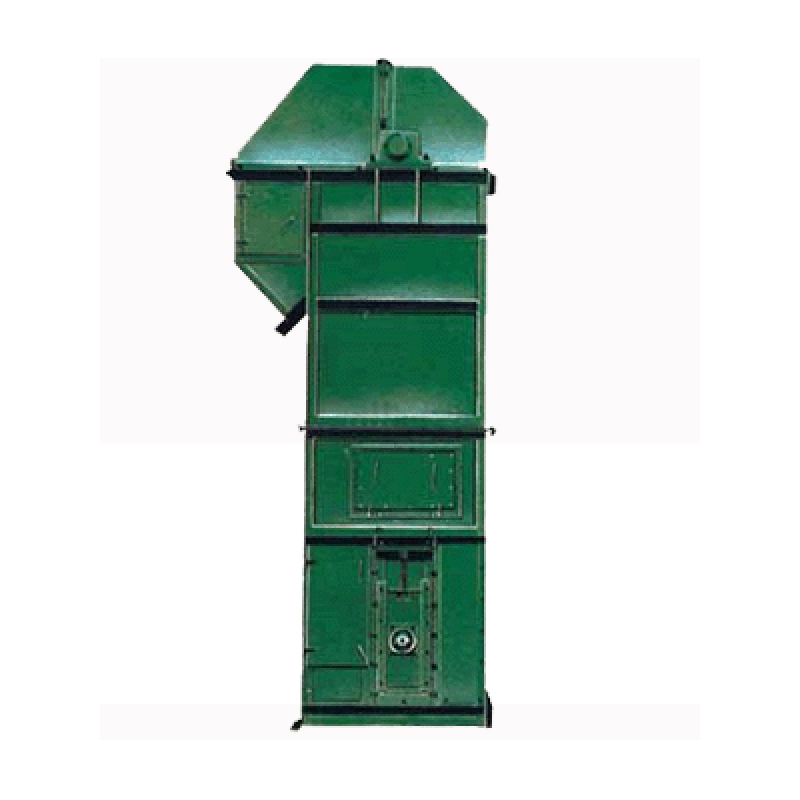 Compound Fertilizer TH Bucket Elevator for Fertilizer Production LinesChain bucket elevator for continuous vertical lifting in compound fertilizer lines; shown near belt-splice and bucket-bolt check guidance during maintenance.View Product →
Tensioning, Tracking and the First Loaded Run
Never take a newly spliced belt straight to full load. The belt needs time to seat on the pulleys, and the take-up needs time to settle before the real load is applied.
- Run the elevator empty for 30 minutes and watch both edges at the head and boot.
- Correct tracking with small, even adjustments to the take-up screws, turning each side no more than a quarter turn at a time.
- Load in steps of roughly 25, 50, 75 and 100 percent of rated capacity, allowing 15 to 20 minutes at each stage.
- Re-torque the bucket bolts after the first eight hours of running, because new belts relax and fixings loosen.
- Re-check belt tension and tracking again after 24 and 72 hours of operation.
Mistakes That Lead to a Second Shutdown
Most repeat failures within a month of a belt change trace back to a short list of avoidable errors.
- Skipping lockout, or locking the panel instead of the starter, leaving the elevator able to start remotely.
- Cutting the belt without clamping both ends first, allowing the belt to run away down the leg.
- Fitting the splice facing the wrong way, so fasteners catch on the head pulley on every revolution.
- Setting tension by feel rather than by the take-up specification, which either slips the boot pulley or overloads the bearings.
- Reusing stretched or corroded bucket bolts instead of fitting new ones.
- Leaving offcuts, tools or old belt sections inside the casing, where they jam the buckets on first start.
Frequently Asked Questions
Can the belt be replaced without removing the buckets?
Yes, on most belt elevators the buckets stay bolted to the belt and travel through the casing with it during the pull-through. Removing every bucket is only necessary when the bucket bolts themselves are being renewed or when a bucket spacing change is planned at the same time.
How often should a bucket elevator belt be replaced?
There is no fixed interval, because belt life depends on material abrasiveness, temperature, tension and how well the elevator is tracked. Judge by condition rather than calendar: edge damage that keeps returning, exposed carcass, and a take-up that has run out of stroke are the practical triggers.
What tension should a new belt be set to?
Set tension by the take-up specification for the belt and drive, not by sound or feel. As a working rule, apply enough tension to stop the boot pulley slipping under full load, then check that the take-up still has at least a third of its stroke remaining for future elongation.
How long should a new belt run before full load?
Plan for two to four hours of progressive loading, starting empty and finishing at rated capacity. Rushing this stage is the most common reason a new belt mistracks or sheds buckets in its first week.
A belt change is one of the few maintenance jobs where preparation time is repaid several times over. Decide the splice method before the belt is ordered, isolate properly, control both ends of the belt during the cut, and give the new belt a staged run-in. Do that, and the replacement stays a one-shift job instead of becoming a repeat shutdown three weeks later.